A VPN on your iPhone routes your internet traffic through a VPN server. This can add privacy when you use Wi-Fi away from home, such as at an airport or while traveling. It can also change the IP address websites see, depending on the server you choose.
This guide uses Proton VPN because it has a free option and the setup is quick. You can also find NordVPN and Mullvad VPN in the App Store. NordVPN and Mullvad are paid options, while Proton VPN lets you connect without paying for a plan.
Video Tutorial
Set up Proton VPN on your iPhone
You install and manage a VPN through its iPhone app. The first connection requires permission because iOS needs to add the VPN configuration to your phone.
- Open the App Store on your iPhone.
- Search for Proton VPN.
- Install the Proton VPN app, then select Open.
- On the first screen, select Continue as guest if you want to use the app without creating an account. You can instead select Sign in to sign in or create a Proton account.
- You may see an offer for the paid version, called VPN Plus. Close that offer with the X in the top-left corner, or select No thanks if that option appears.
- Complete the brief app walkthrough until you reach the main Proton VPN screen.
At this point, Proton VPN is installed but not yet protecting your connection. You need to connect to a server first.
Connect to a VPN server
From the Proton VPN main screen, select Connect. The first time you do this, your iPhone asks for permission to configure a VPN.
- Select Connect in Proton VPN.
- When iPhone asks to allow Proton VPN to add VPN configurations, select Allow.
- Enter your iPhone passcode when prompted.
- Wait for Proton VPN to finish connecting.
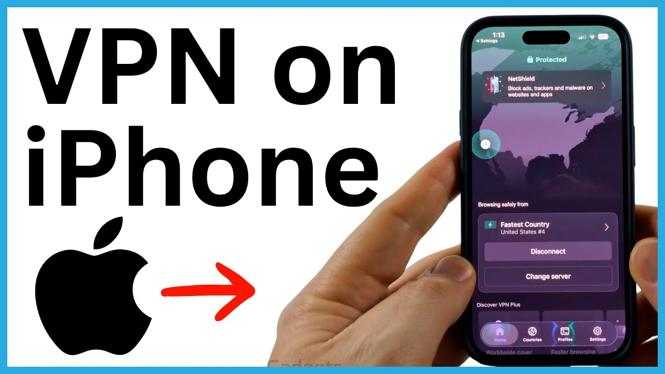
When the app says Protected, your VPN connection is active. Proton VPN also shows the location of the server handling your connection. For example, the app may show a server in California or another available location.
Your browsing traffic now goes through that VPN server instead of directly through the Wi-Fi network you joined. This is useful when you want extra privacy on a network that is not your own.
Check if your iPhone VPN is on
You do not need to reopen the app every time just to confirm the connection. Swipe down from the top-right corner of your iPhone screen to open Control Center. Look near the Wi-Fi symbol at the top. When the VPN is active, you will see VPN.
This is a quick check before you browse on public Wi-Fi. If you do not see the VPN indicator, open Proton VPN again and check its connection status.
Change your VPN location
A VPN server location affects the IP address that websites see. If a server feels slow, or you need a connection through a different country, you can switch servers from inside Proton VPN.
- Open the Proton VPN app.
- Select Change server.
- Choose another available server location.
- Wait for the app to reconnect and show Protected.
For example, you might start on a server in the United States and then change to one in the Netherlands. After the switch, your internet traffic routes through the newly selected location. The app can reconnect quickly, but connection speed can vary by server and network conditions.
Turn off the VPN when you are done
Leaving the VPN on is fine when you want its privacy benefits. If you need to stop using it, return to the Proton VPN app and select Disconnect. The Protected status will disappear, and the VPN indicator should no longer appear in Control Center.
Disconnecting sends your internet traffic through your normal connection again. If you are on public Wi-Fi and want the added privacy of a VPN, reconnect before using that network.
Other iPhone VPN options shown
Proton VPN is the free option used for the setup above. It can be a practical choice if you only need a VPN occasionally, such as when traveling or connecting to Wi-Fi outside your home.
NordVPN is another option shown in the App Store. It is a paid VPN with servers in locations around the world, and you can use the same subscription across supported devices. Mullvad VPN is also paid and is focused heavily on privacy. The video notes that Mullvad can be set up with crypto and without creating an account.
Whichever app you choose, the basic iPhone process is similar: install the VPN app, sign in or continue as the app allows, approve the iPhone VPN configuration when asked, and connect to a server. Check for the VPN indicator in Control Center whenever you need to confirm that the connection is active.
More tutorials
 Subscribe Now! 🙂
Discover more from Gauging Gadgets
Subscribe to get the latest posts sent to your email.