You can cancel a Roku channel subscription or free trial from the Roku TV home screen. The important part is finding the channel you subscribed to, then checking its options menu for Manage subscription. From there, you can turn off auto renew before the next billing date.
Turning off auto renew stops future charges. You can still use the channel until the subscription end date Roku shows after you confirm the cancellation.
Video Tutorial
Cancel a subscription on your Roku TV
You do not need to open the channel to cancel it. Start on the Roku home screen, where you can see your installed channels. Use your Roku remote to highlight the channel that has the subscription or free trial you want to stop.
- Go to the Roku TV Home screen.
- Find and highlight the channel with the subscription you want to cancel.
- Press the asterisk (*) button on your Roku remote.
- Look for and select Manage subscription.
- Review the subscription details, including the date it is set to renew.
- Select Turn off auto renew.
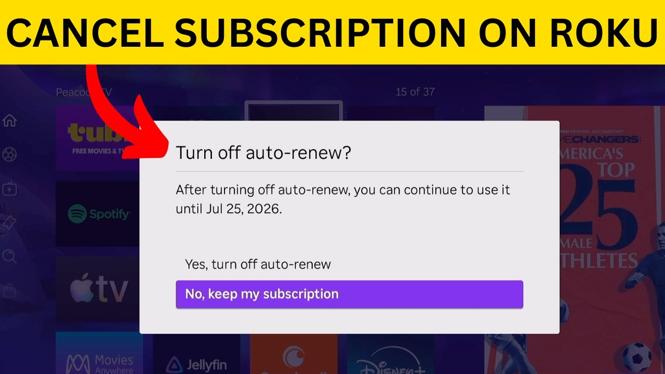
- When Roku asks for confirmation, select Yes, turn off auto renew.
After you confirm, Roku begins canceling the subscription. The subscription details screen will show the date your access ends. You can keep watching that channel through that date, but it will not automatically renew afterward.
What Manage subscription means
The Manage subscription option is the key item to check in the channel menu. If you see it after pressing the asterisk button, Roku recognizes that channel as having a subscription you can manage from your TV.
Selecting it opens the subscription information. This is where you can confirm that the channel is currently subscribed and see its scheduled renewal date. Check this date before turning off auto renew, especially if you are canceling a free trial. Canceling before the renewal date helps prevent the trial from becoming a paid subscription.
If you do not see Manage subscription in the channel menu, do not assume the subscription has been canceled. The option shown in this method only appears for a channel with a subscription available to manage through that menu. Check that you highlighted the correct channel on the home screen before trying again.
Turn off auto renew before a free trial ends
A free trial can be managed using the same steps. Highlight the channel, press the asterisk button, and select Manage subscription if it appears. The subscription page shows when the trial or subscription is scheduled to renew.
Choose Turn off auto renew, then confirm by selecting Yes, turn off auto renew. Roku then shows when access will end. This gives you a clear end date and lets you use the channel for the remaining time without another automatic renewal.
Do this as soon as you decide you do not want to continue. You do not need to wait until the last day of the trial. Turning off auto renew early is useful because you can still watch until the end date shown on the Roku TV.
Check that the cancellation went through
After choosing Yes, turn off auto renew, look at the message Roku displays. It should tell you the date your subscription will end. That end date is your confirmation that auto renewal has been turned off.
The channel may remain on your home screen after cancellation. That is normal. Removing a channel and canceling a subscription are different actions. For this process, focus on the subscription status and end date shown after you turn off auto renew.
If you are canceling more than one channel, repeat the process for each one. Highlight one channel at a time, press the asterisk button, and check for Manage subscription. This makes it easier to review each renewal date and stop only the subscriptions you no longer want.
Quick checklist
- Start from the Roku TV home screen.
- Highlight the subscribed channel.
- Press the asterisk button on the Roku remote.
- Select Manage subscription when it is available.
- Select Turn off auto renew.
- Confirm with Yes, turn off auto renew.
- Check the displayed subscription end date.
Once auto renew is off, your channel access continues only until the end date Roku provides. No further renewal should occur for that subscription.
More Roku Tips & Tutorials:
 Subscribe Now! 🙂

Discover more from Gauging Gadgets
Subscribe to get the latest posts sent to your email.