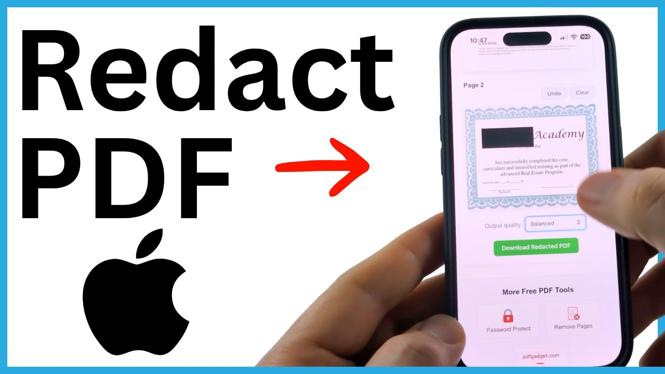
You cannot permanently redact a PDF with the built-in iPhone markup tools alone. Drawing a black shape over text can hide it visually, but the original information may still be available in the file. To remove private details before sharing a document, use the Redact PDF tool at PDFgadget.com.
This process adds black redaction boxes and permanently removes the selected data. You can use it for names, addresses, account numbers, and other text you do not want included in the final PDF.
Video Tutorial
Redact a PDF on your iPhone
- Open PDFgadget.com in your iPhone browser.
- Select More Tools.
- Under the Edit section, choose Redact PDF.
- Read the warning shown on the page. Redacting permanently removes the selected PDF data, so it cannot be recovered afterward.
- Tap the upload box and find the PDF you want to edit. Select the file to load its pages into the tool.
- Drag across the text or area you want to remove. The tool places a black box over that selection.
- Zoom in as needed and check that each box fully covers the private information. This is especially important for small text, long account numbers, and information close to the edge of a page.
- Open another page in the PDF if you need to redact information elsewhere in the document. Repeat the selection process on each page.
- Select an output quality option. Choose Balance or Smaller File if you need a more shareable file size. Choose Maximum Quality when file size is not a concern.
- Select Download Redacted PDF.
The tool processes the document and opens the finished redacted PDF on your iPhone. The covered information is removed from the output file, rather than simply hidden by a drawing layer.
Fix a redaction box before downloading
Check every page before you create the final PDF. A redaction box needs to cover all of the information you intend to remove. Zooming in helps you avoid leaving a letter, digit, or part of a line visible.
If you place a box in the wrong location, select Undo to remove your most recent redaction. Select Clear if you want to remove all redactions from the current page and start that page again. Clearing a page is useful if several boxes need to be repositioned.
Do not download the finished file until you have checked the full document. Once the PDF has been processed, the selected content has been permanently removed from that new copy.
Save the redacted PDF to Files
After the redacted PDF opens, you still need to save a copy to your iPhone. The preview is useful for checking the result, but saving it to Files makes it easier to attach, share, or keep organized.
- In the PDF preview, select the lines at the bottom of the screen.
- Select Share.
- Scroll through the share options and choose Save to Files.
- Choose a location and enter a name for the redacted PDF.
- Select Save.
Open the Files app afterward to confirm the PDF saved correctly. Open the saved copy and review the blacked-out areas one more time before sending it to anyone.
Why drawing over PDF text is not enough
iPhone markup can be useful for quick notes, signatures, and visual edits. It is not the right method when you need to remove sensitive PDF content. A black drawing can cover the text on screen while leaving the underlying text in the document.
Permanent redaction is different. The Redact PDF tool creates a new PDF with the selected information removed. That means the redacted content cannot be searched or recovered from the final file. Keep your original PDF unchanged in case you need it later, and only share the redacted copy.
Choose the right output quality
The output quality setting affects the final PDF size and image quality. Balance is a practical choice for most documents because it keeps the file manageable while preserving a clear result. Smaller File can help when an email, upload form, or messaging app has a file-size limit. Use Maximum Quality when the document contains details you want to retain at the highest available quality.
After saving the file, use the redacted version whenever you need to send the document. This lets you share the PDF without including the private details you removed.
More PDF Tools & Tutorials:
 Subscribe Now! 🙂


Discover more from Gauging Gadgets
Subscribe to get the latest posts sent to your email.