Is your Windows Defender automatically turning back on and driving you nuts? In this tutorial, I show you how to turn on/off Windows Defender permanently. This can be very helpful because it will remain disabled without turning back on automatically.
Note: This tutorial may require administration rights on your Windows 10 PC or laptop.
Video Tutorial:
Follow the steps below to turn off Windows Defender:
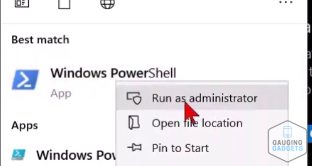
- Select the start menu by selecting the small windows icon in the bottom left.
- Start typing Windows PowerShell, but before you open it, right-click it and select Run as Administrator. This should open up a window that looks a little like code.
- Copy one of the two below text options to either disable or enable:
- Disable:
Set-MpPreference -DisableRealtimeMonitoring $true - Enable:
Set-MpPreference -DisableRealtimeMonitoring $false
- To paste the text correctly, right-click on the blinking icon, and it should paste into place, then press Enter.
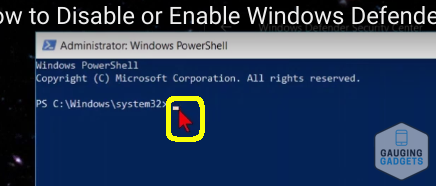
- You have now disabled or re-enabled Windows Defender on Windows 10.
More Windows 10 Tutorials:
 Subscribe Now! 🙂
1
/
13
How to FREE Up Disk Space in Windows 10 PC & Laptop - Get More Than 30GB+ of Storage
How to Remove the Weather Widget from the Taskbar - Turn off News and Interests in Windows 10
How To Get Animated Wallpaper on Windows 10 - Live GIF Background Windows 10
How to Fix Webcam Issues in Windows 10 - Camera Not Working
How to Check GPU Temperature - Monitor Graphics Card Temp Windows 10
Connect Xbox One Controller to PC - Windows 10 Wireless Bluetooth
Windows 10 Factory Reset - How to Reset Your Computer to Factory Settings
How to Turn On Game Mode - Windows 10 Tutorial
How to Boot Into Safe Mode - Windows 10 Tutorial
How To Enable Night Light - Windows 10 Tutorial
How To Check Windows 10 RAM and System Specs - Windows 10 Tutorial
How To Create A System Restore Point - Windows 10 Tutorial
How To Turn Windows 10 Into A Hotspot - Windows 10 Tutorial
How to Change Screen Saver Settings - Windows 10 Screensaver Tutorial
How to Use Windows 10 Storage Sense - Clear Storage on Windows 10
1
/
13
Discover more from Gauging Gadgets
Subscribe to get the latest posts sent to your email.